Supabase Integration
Integrate a full-featured backend into your EZsite application with Supabase.
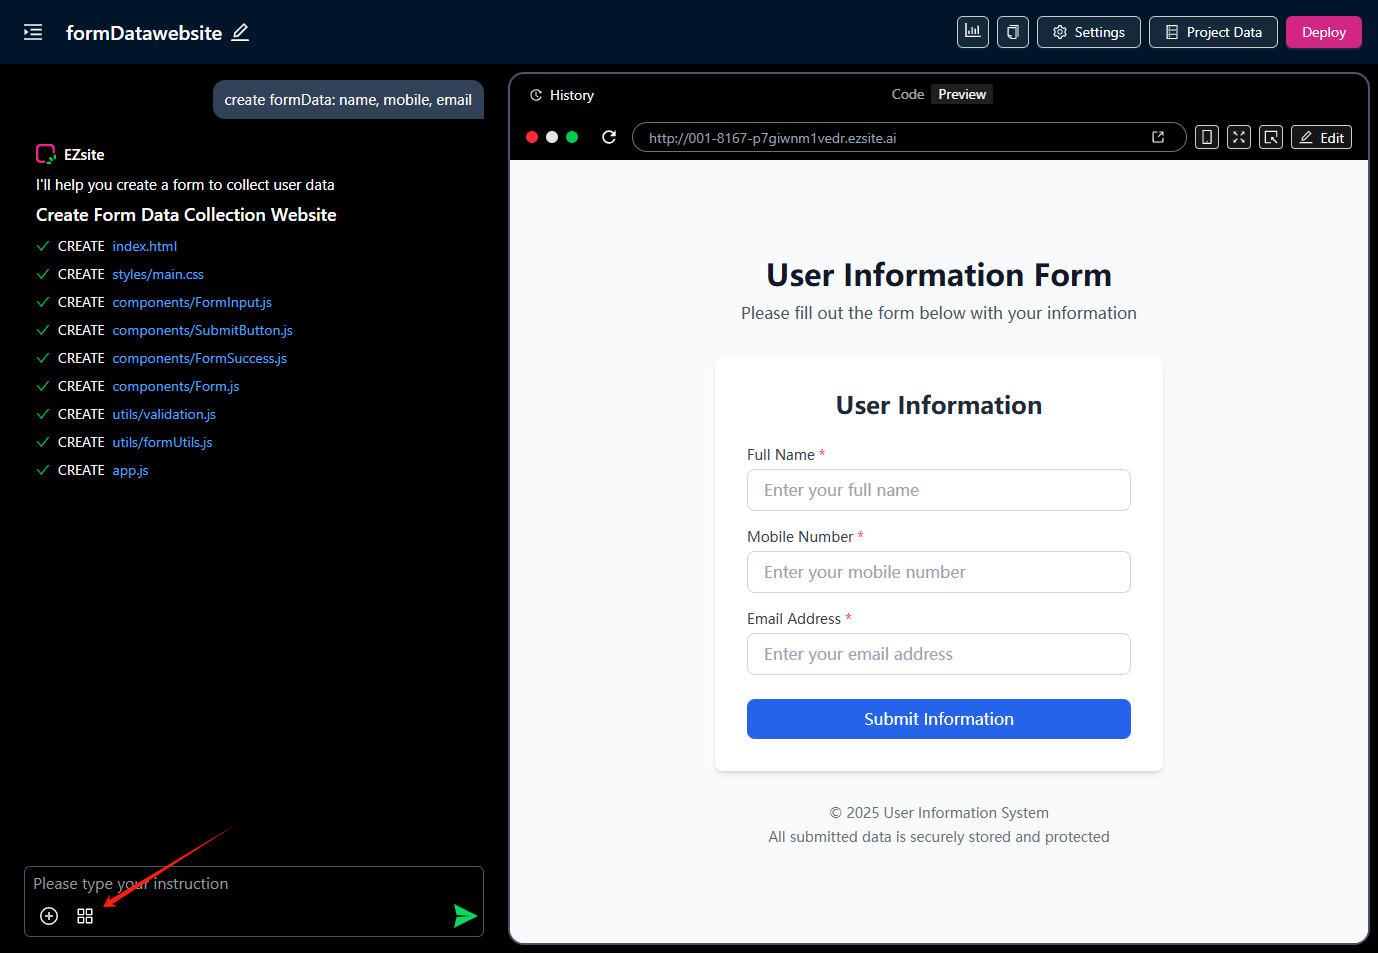
EZsite’s native Supabase integration lets you manage both your front-end UI and your back-end database through a single, easy-to-use chat interface. In other words, you can design your app’s screens and set up a cloud PostgreSQL database without leaving EZsite. This unified approach makes powerful app development accessible to everyone – non‑technical users can rely on EZsite’s guidance, while experienced developers can tap into advanced Supabase features as needed.
Connecting Supabase to EZsite
1. Create a Supabase account
Register a new Supabase account here or sign in if you already have one.
2. Create a new project in Supabase
Click on + New Project, complete the necessary fields, and allow a few minutes for setup.
3. Connect Supabase to EZsite
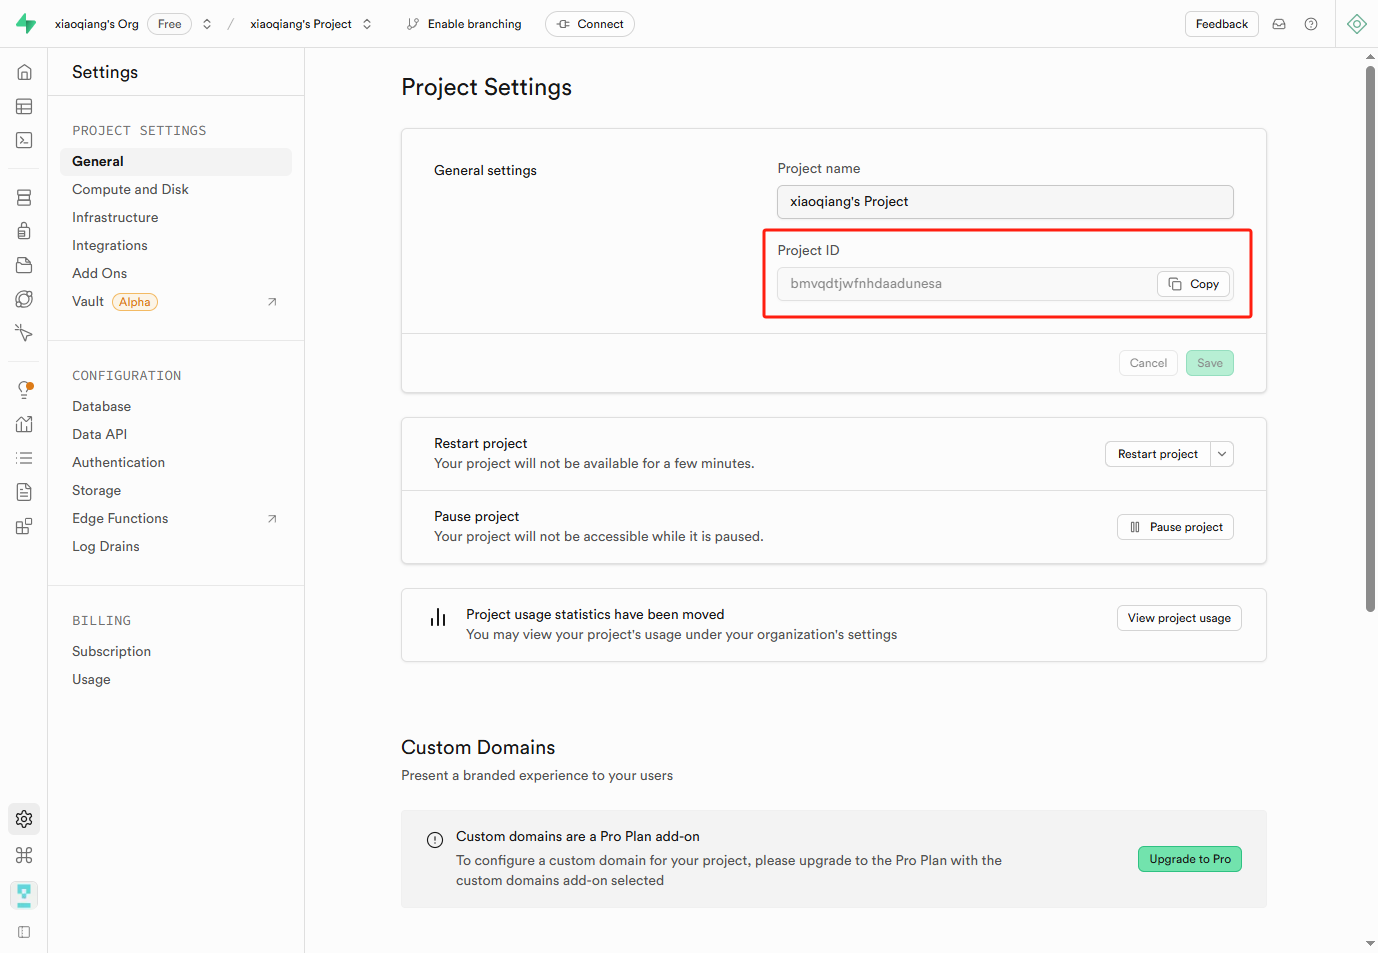
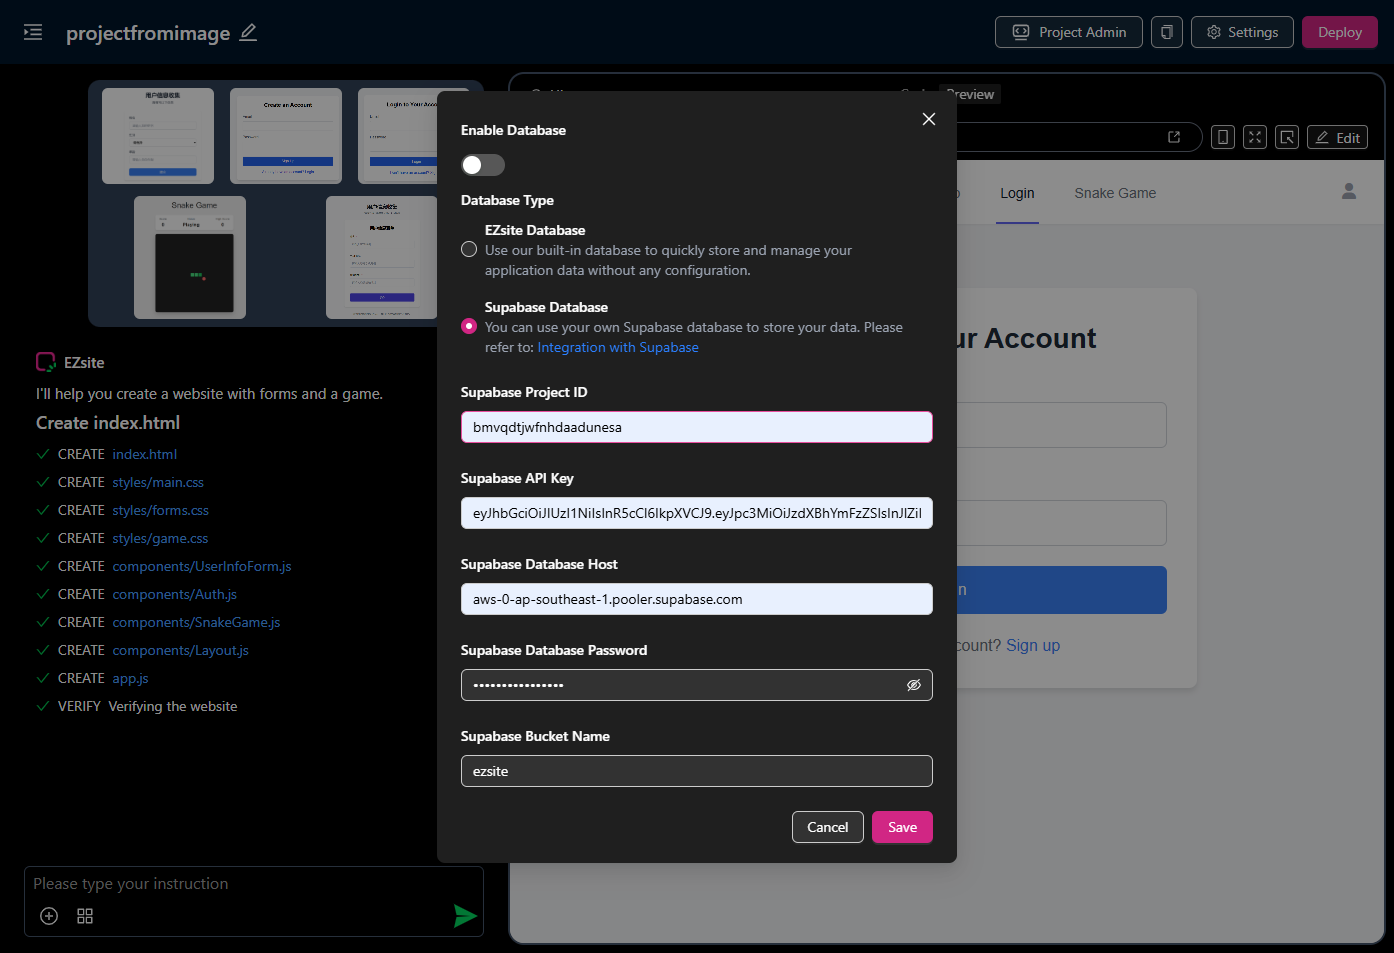
3.1. Open EZsite database configuration
3.2. Copy your Supabase project id to EZsite
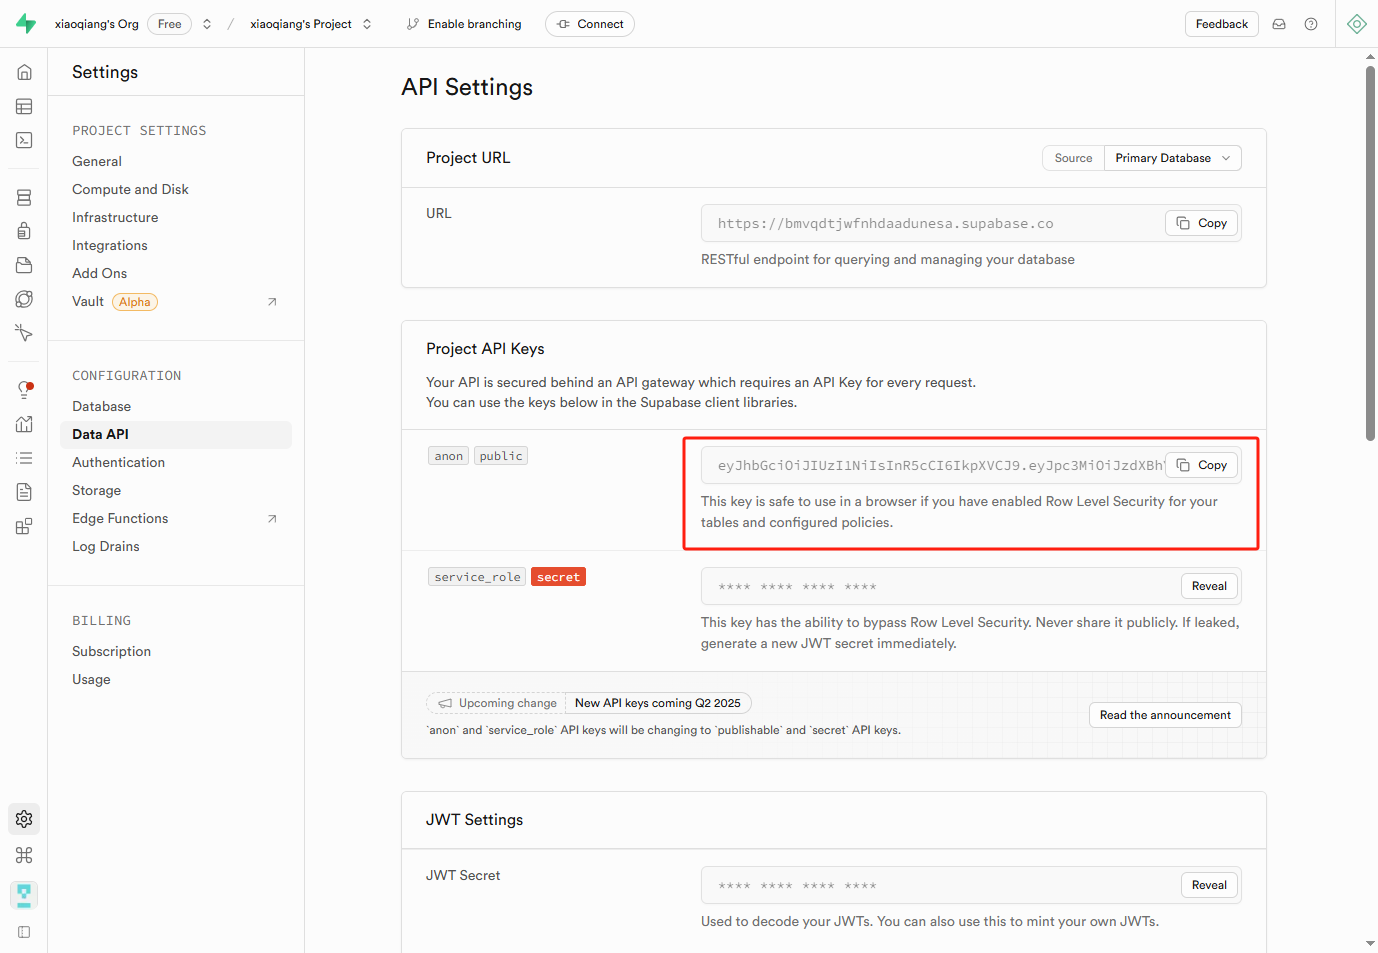
3.3. Copy your Supabase project API key to EZsite
3.4. Copy your Supabase database host to EZsite
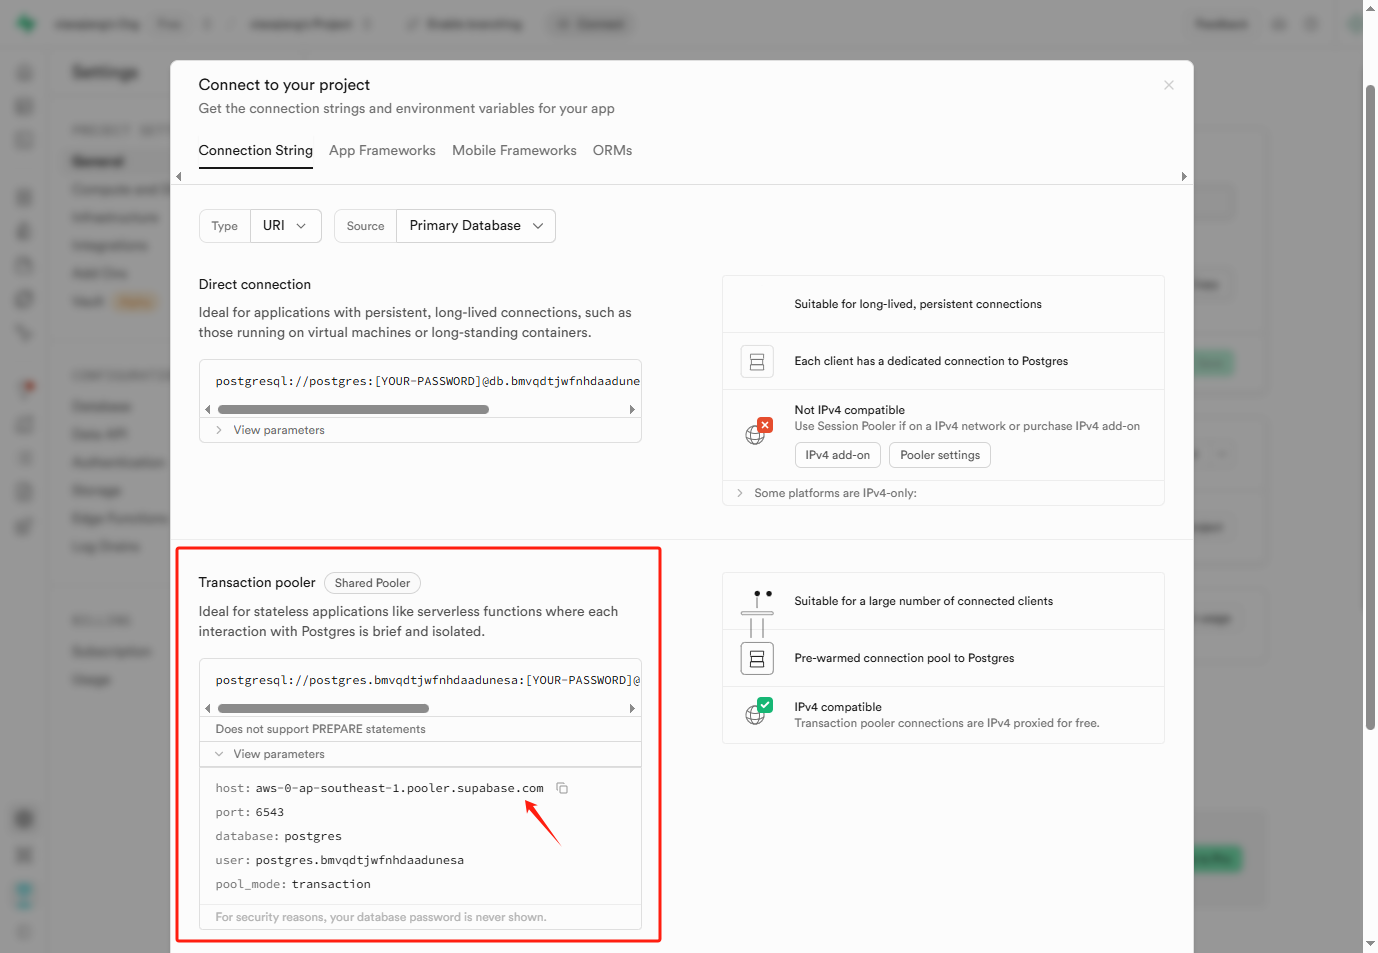
Click Connection in the top sidebar.

What we need is the host of the Supabase database starting with aws, which can be found in Connection String - Transaction Pool.
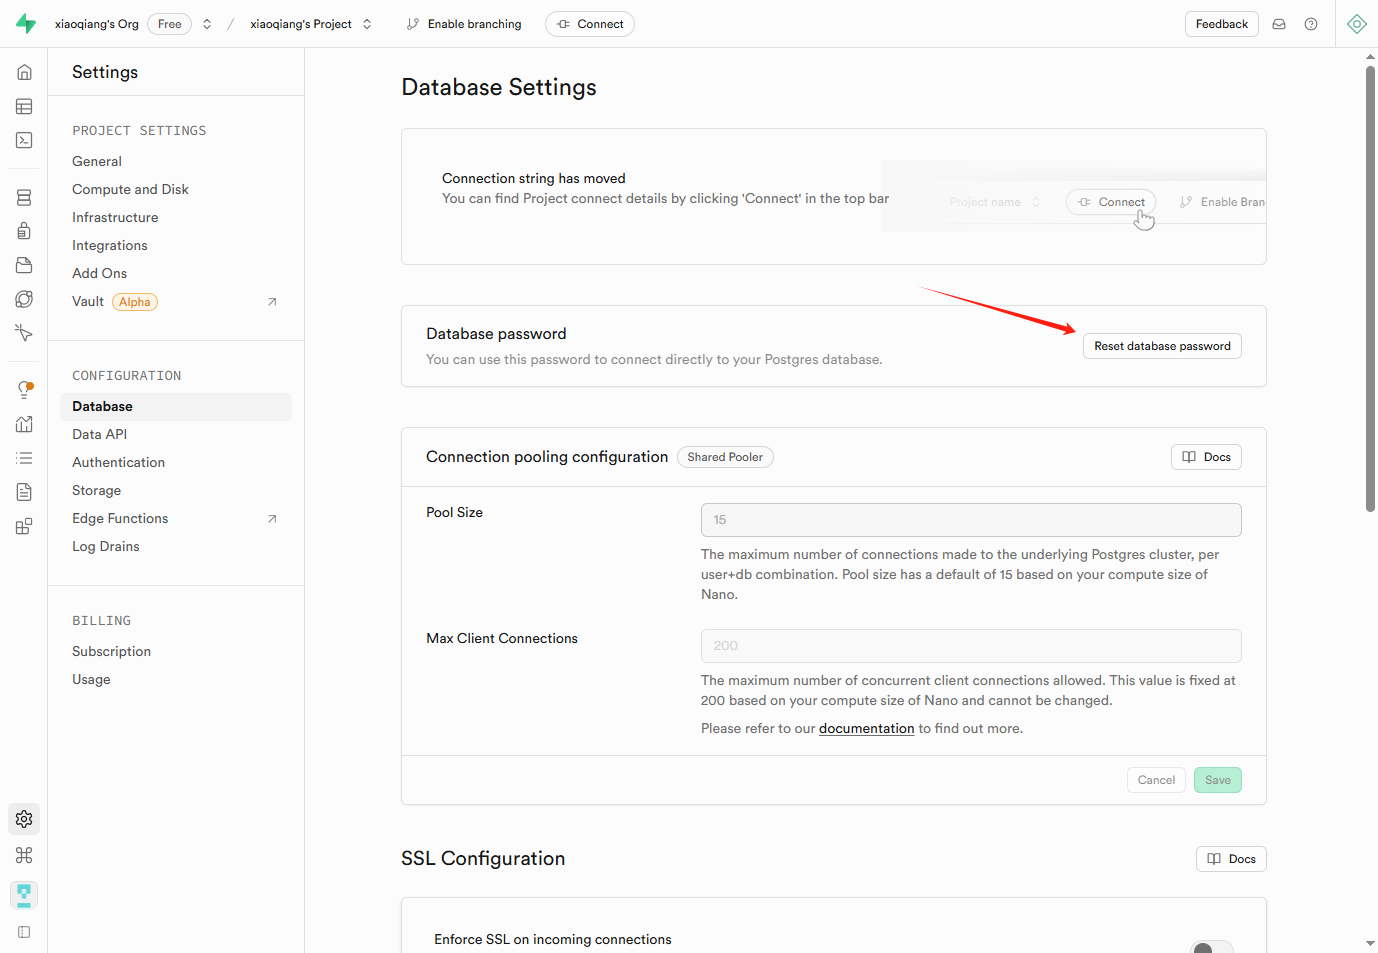
3.5. Fill in your Supabase database password in EZsite
If you forget your password, you can reset it in Supabase
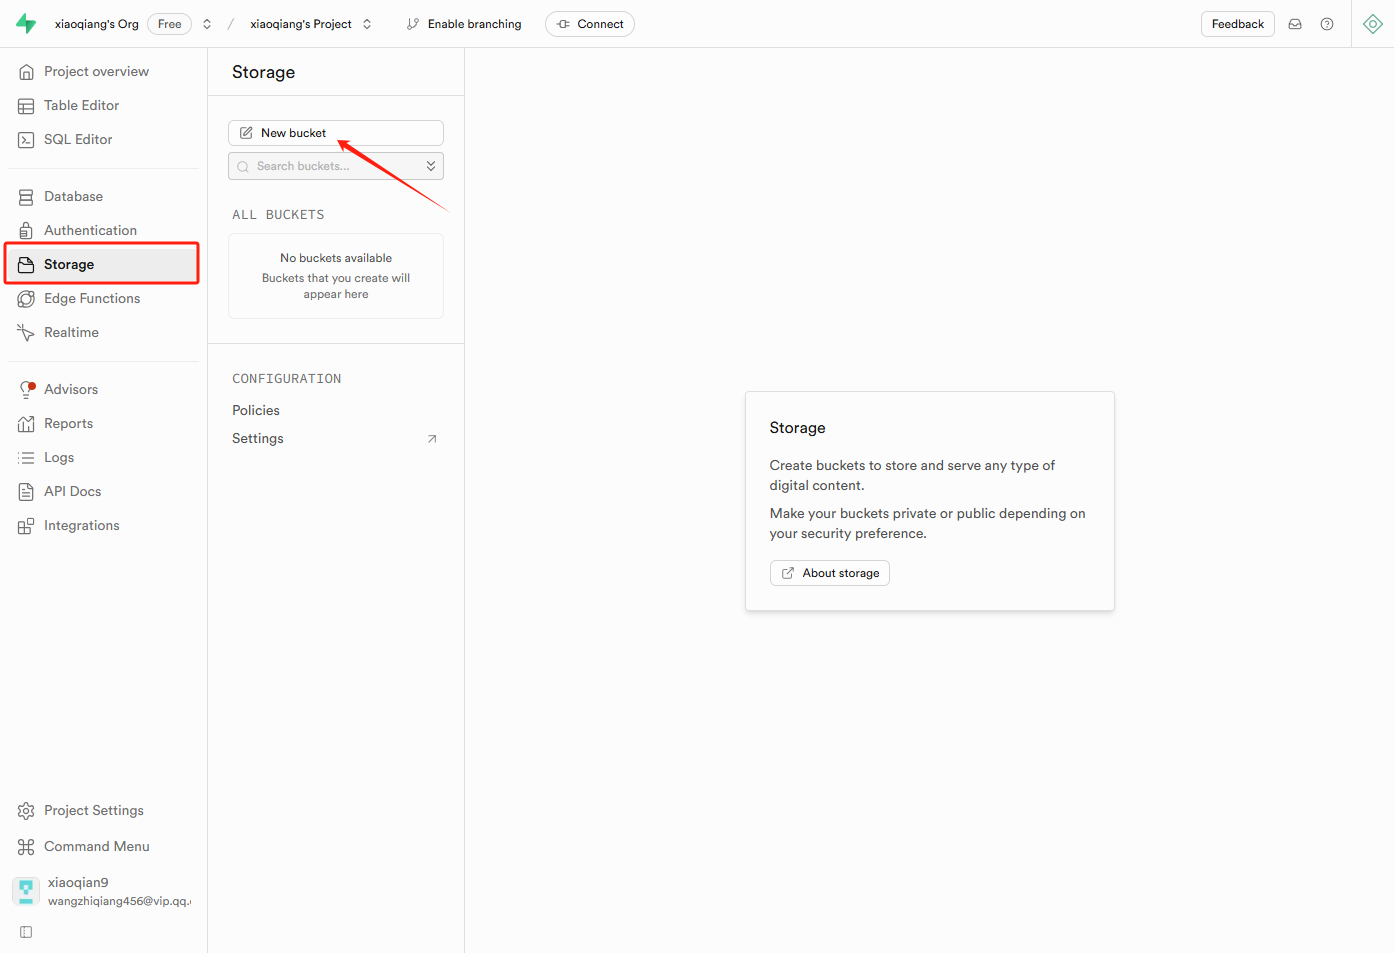
3.6. Fill in your Supabase storage bucket name in EZsite
3.6.1 Open Supabase's Storage settings page.
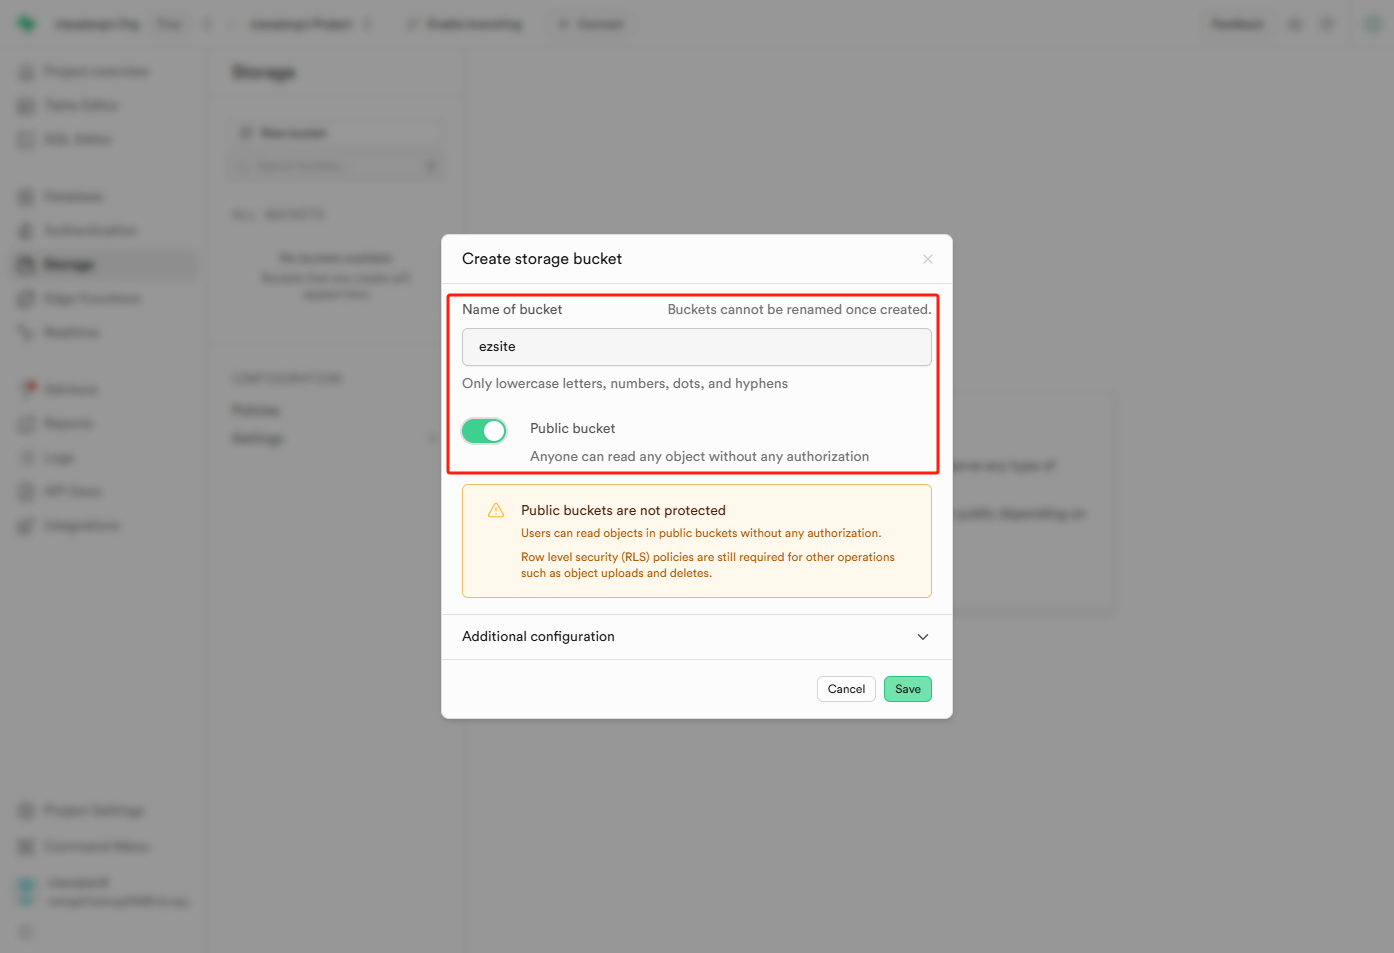
 3.6.2 Create storage bucket. Enter the storage bucket name (recommended: easysite), and turn on the public bucket switch.
 3.6.3 Copy the bucket name to
 EZsite.
3.7. Save your configuration in EZsite
4. Authentication URL Configuration in Supabase
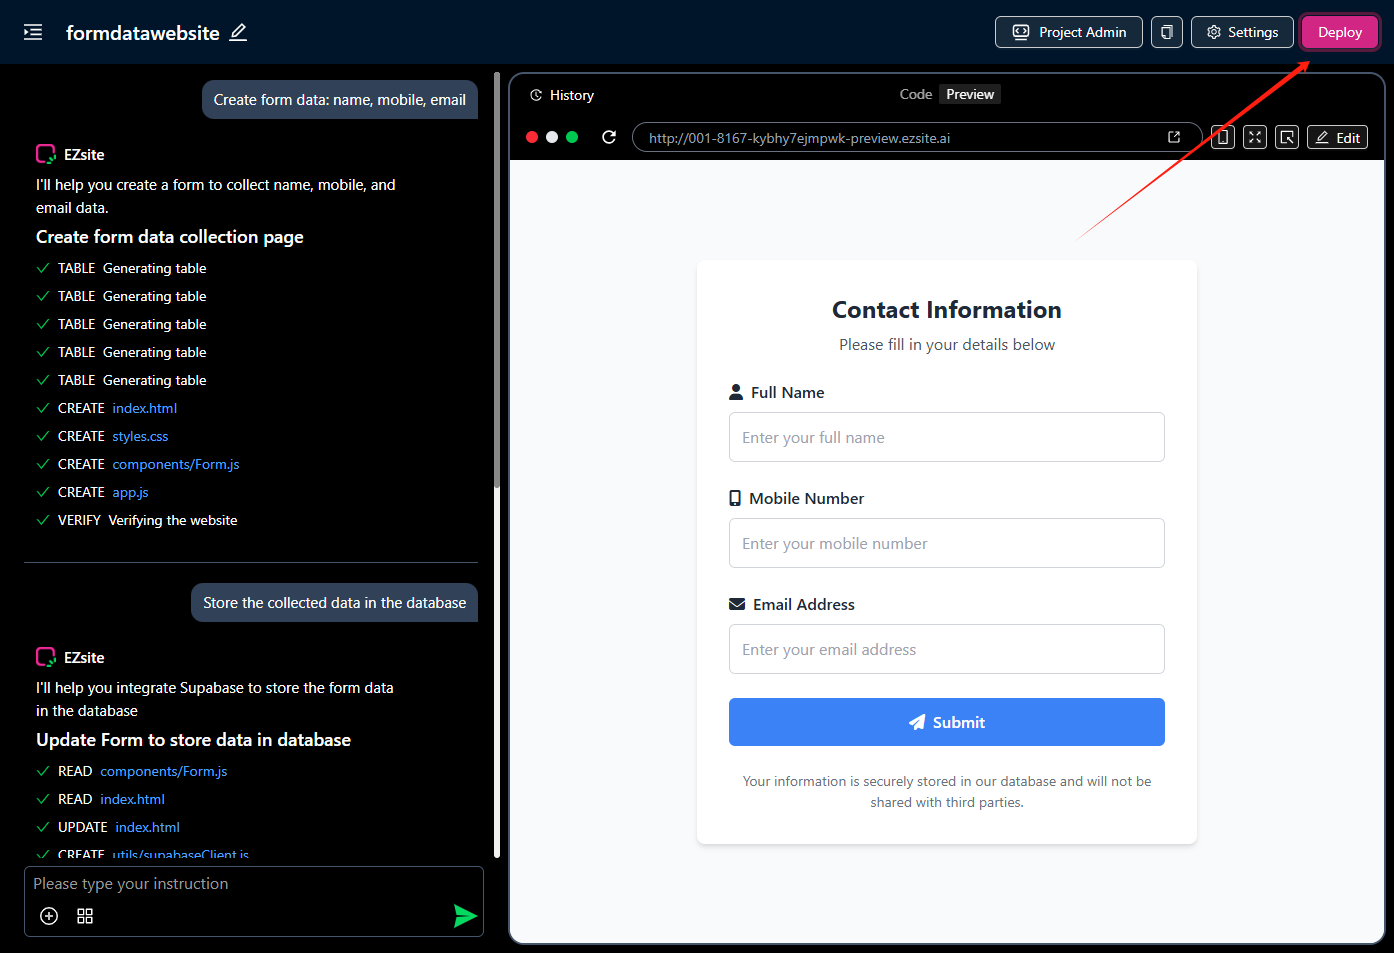
4.1. Click the "Deploy" button in the upper right corner of EZsite
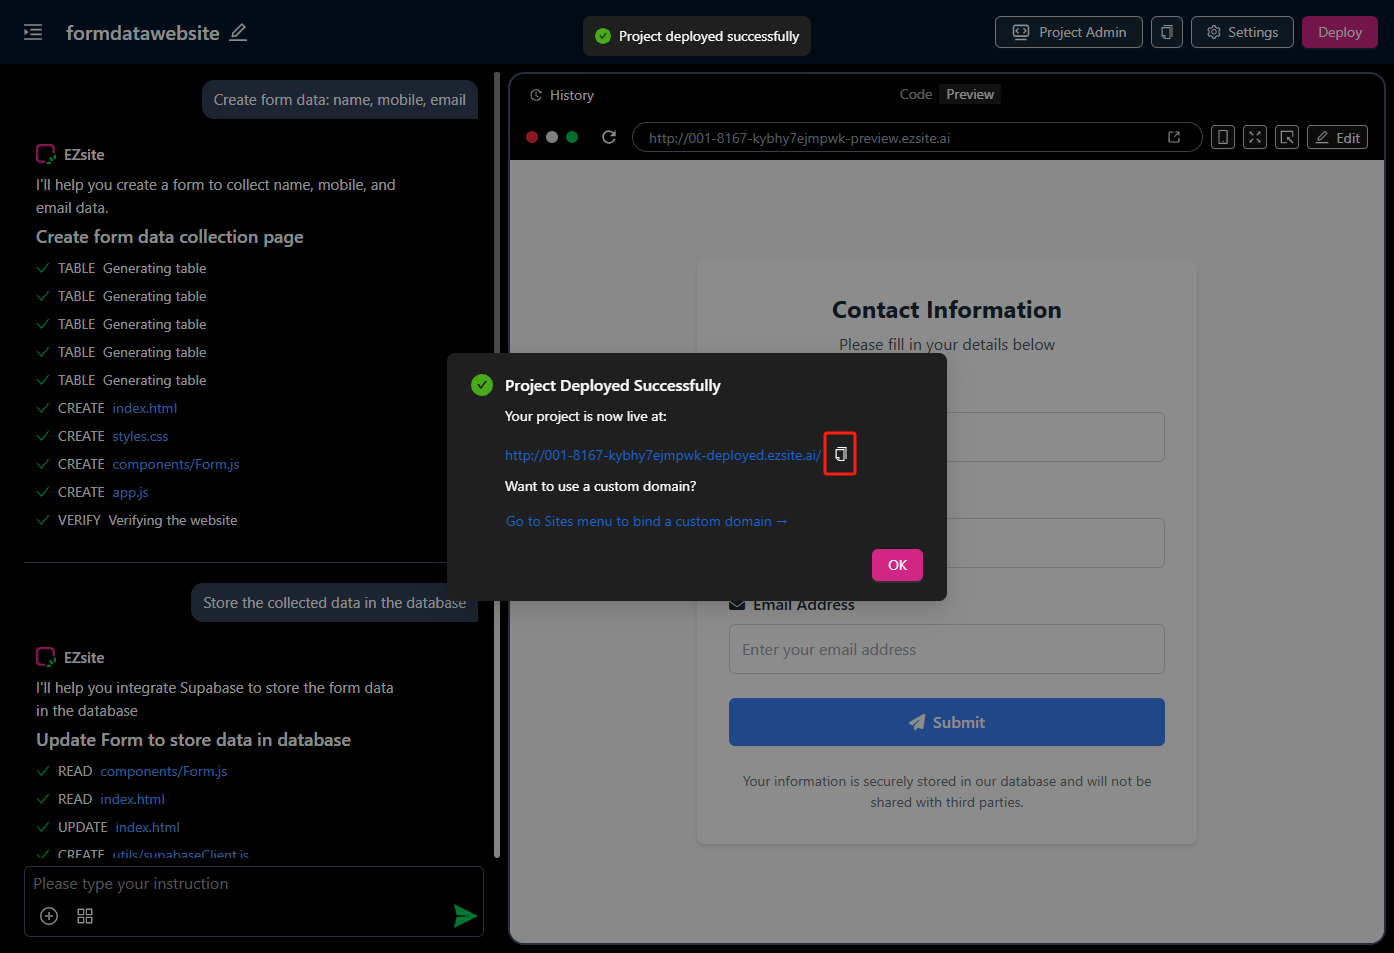
4.2. Copy the project address in EZsite
4.3. Paste the EZsite project address in Supabase and save
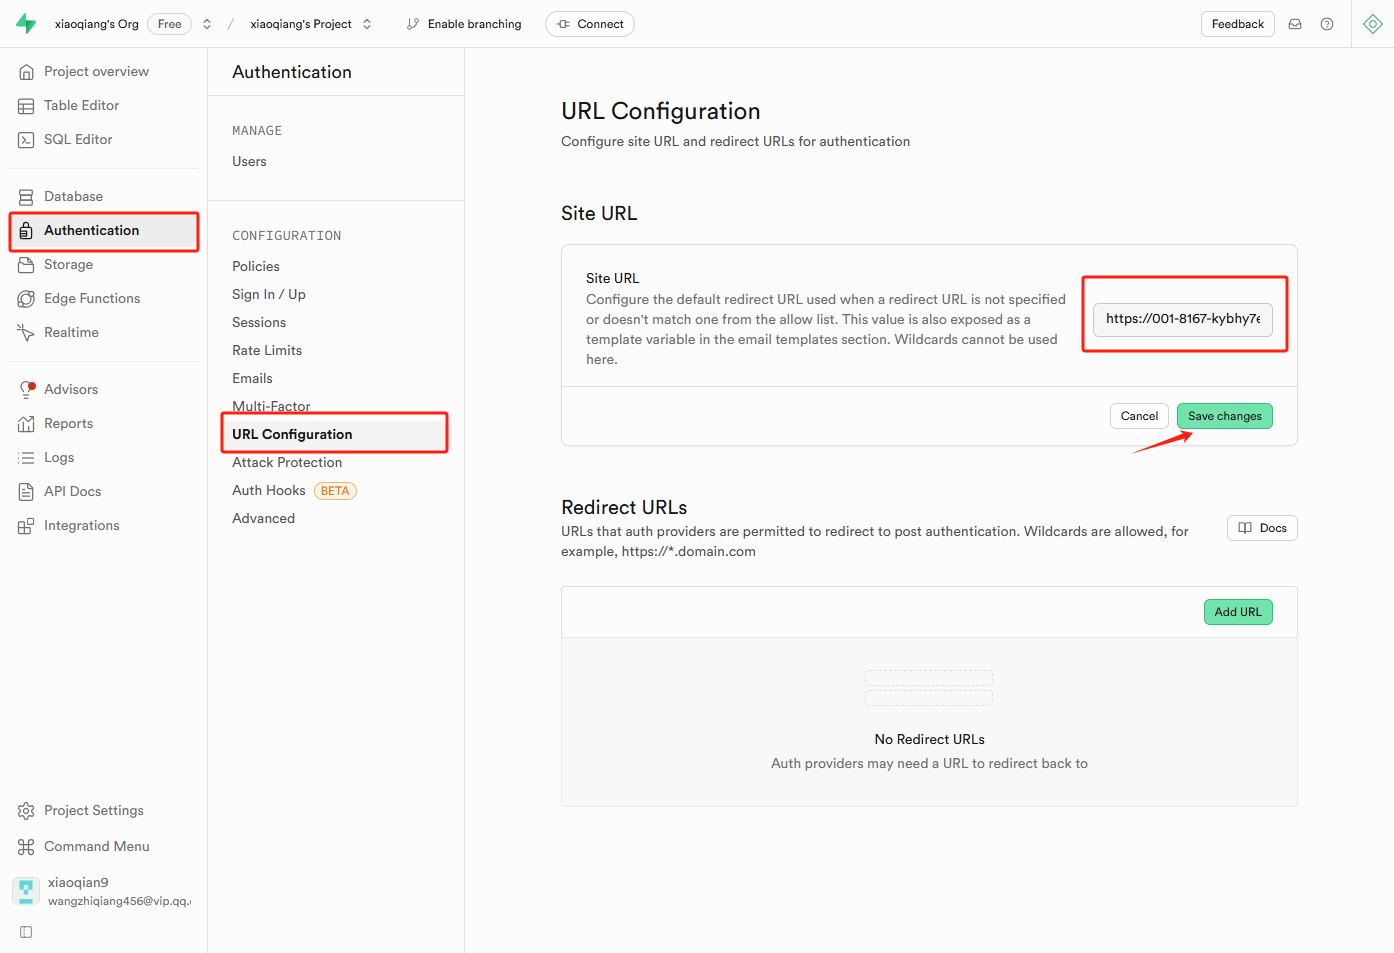
4.3.1. Open Supabase authentication configuration page.
4.3.2. In Site url, paste the EZsite project address.
4.3.3. Click the "save changes" button to save your changes.
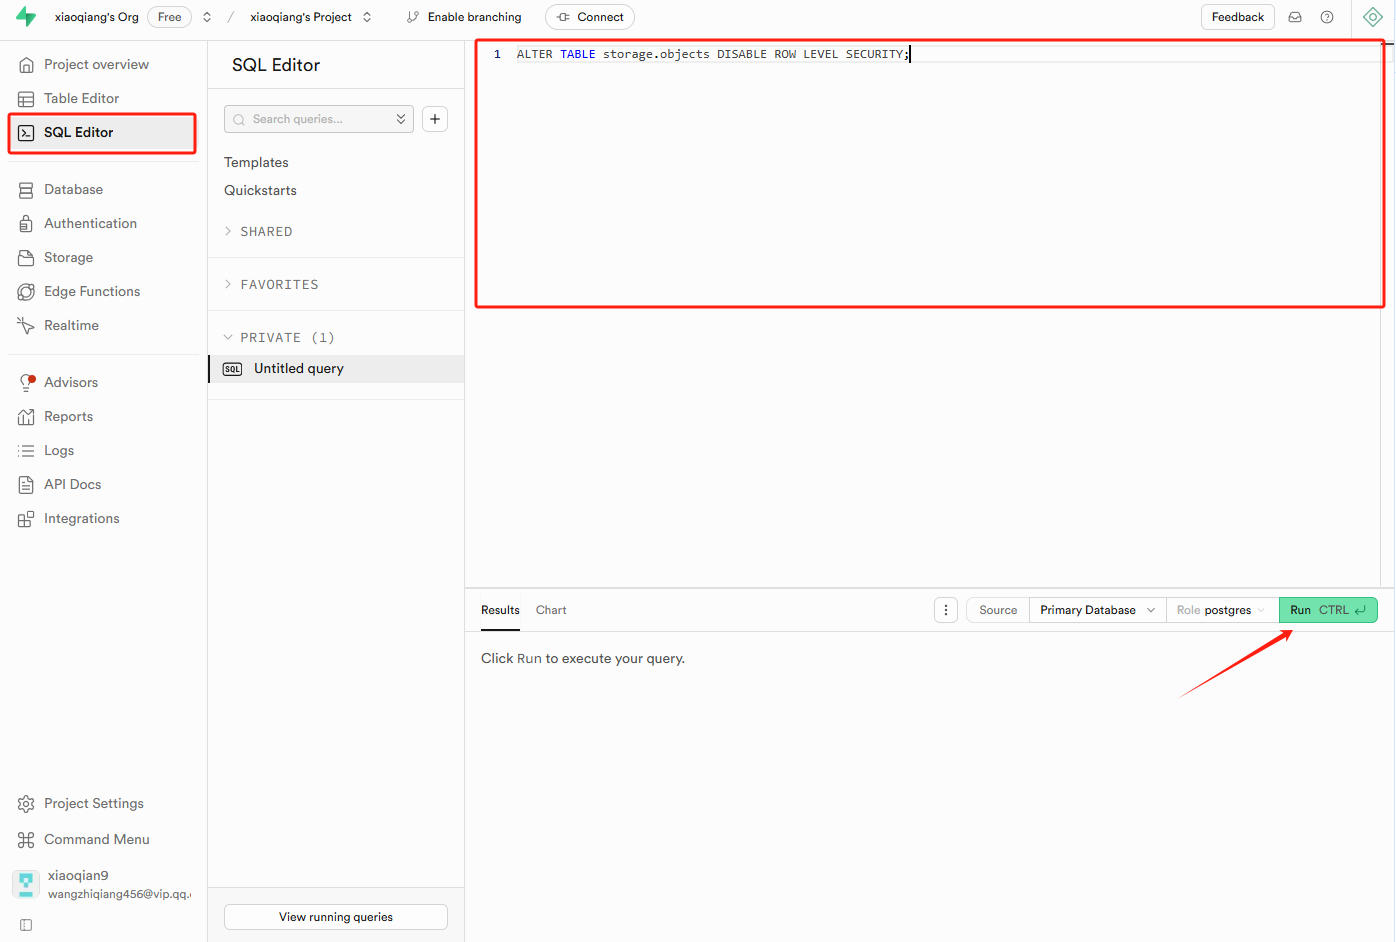
5. Set storage to public access so that EZsite can read data.
5.1. Open Supabase's SQL Editor page.
5.2. Enter the command “ALTER TABLE storage.objects DISABLE ROW LEVEL SECURITY;”.
5.3. Click the “Run” button to execute the command.