Google Login Integration
Set Google Login in EZsite
-
In
EZsite, enter a project, click the "Settings" button in the top right corner to open the settings panel.
-
In the settings panel, click on "Third-party Integration", then click the "Google Login" button to enter the Google Login settings page.
-
On the Google Login settings page, to enable Google login, you must first enable
EZsiteDatabase. Click the "Enable now" button to navigate to the Database tab.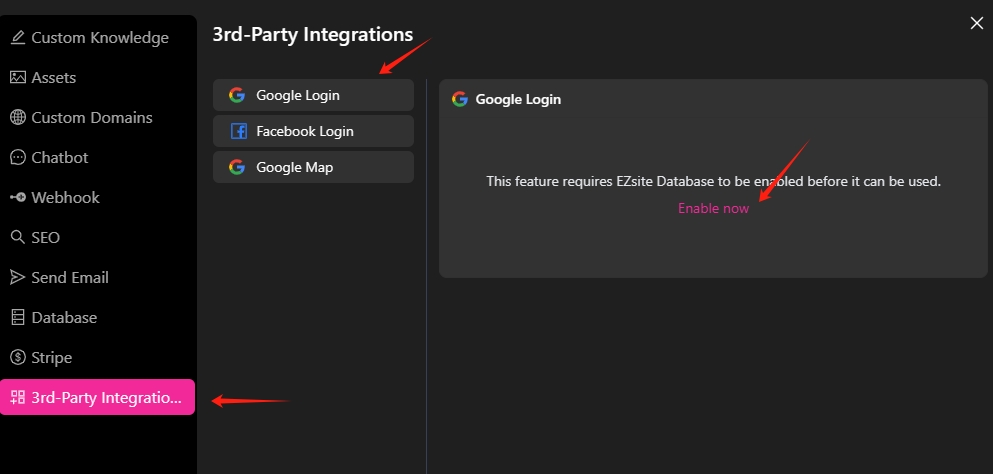
-
On the Database settings page, click the "Enable Database" button, select "
EZsiteDatabase" for the Database Type, then click the "Save" button to save the settings.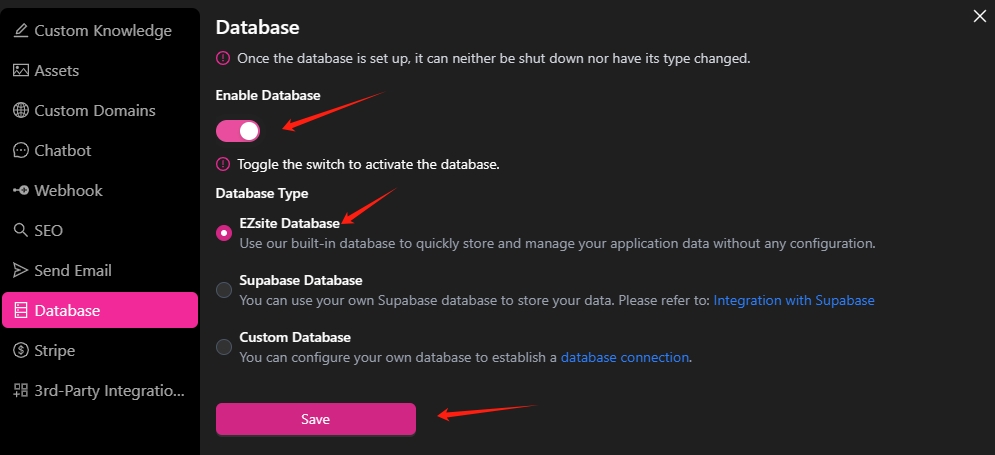
-
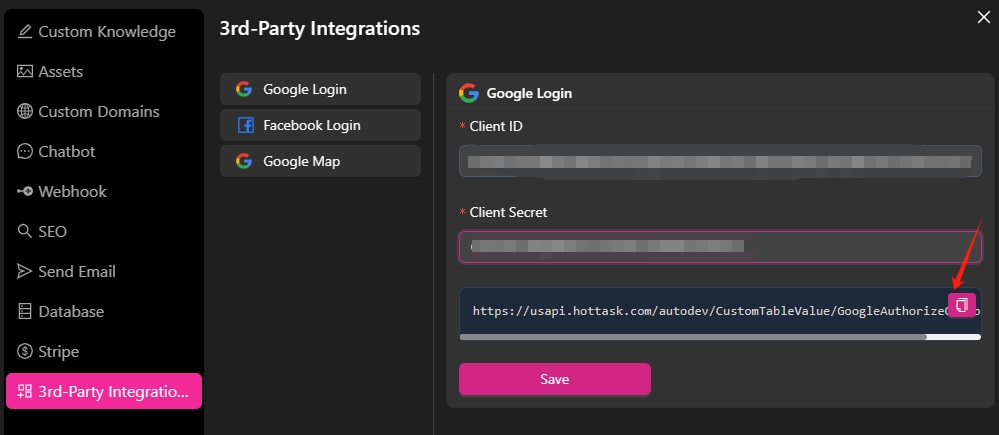
Return to the Third-party Integration tab, click the "Google login" button, and copy the Google Redirect URL, which will be used in step 8.
-
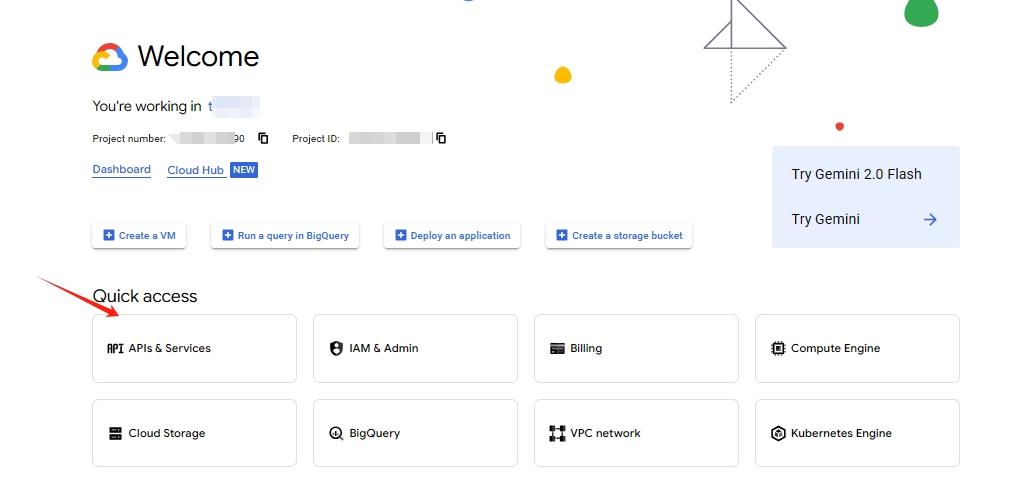
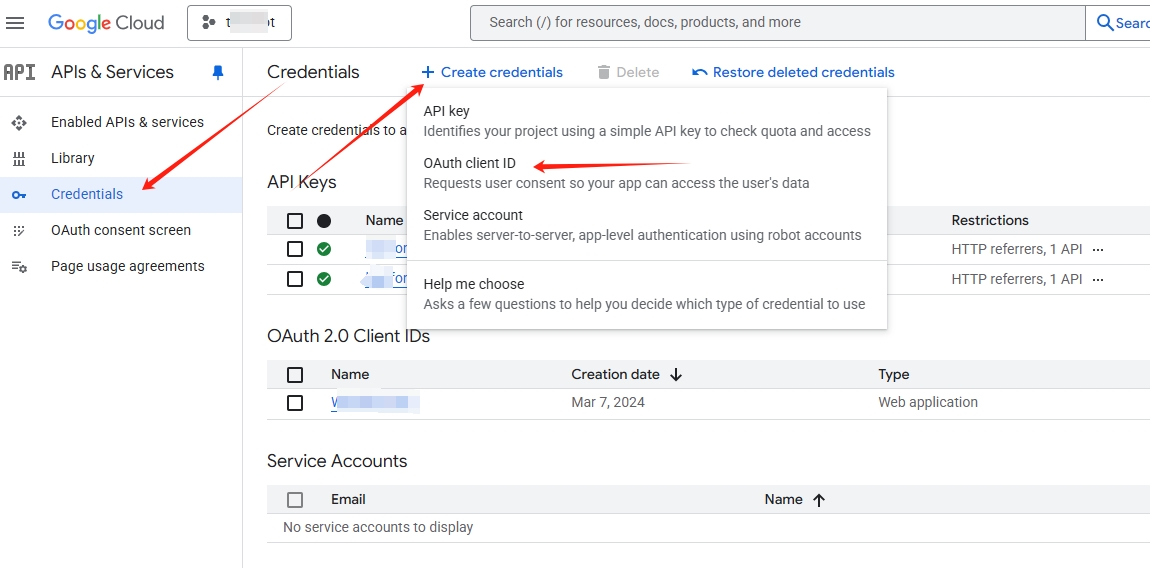
Open the Google Cloud Console, create a new project or open an existing one, click the project name, then click the "APIs & Services" button.
-
In the project, click the "Credentials" button, click the "Create Credentials" button, select "OAuth Client ID".
-
Set application type to "Web application", set the application name, for example "
EZsiteGoogle Login", then enter the Google Redirect URL copied in step 5 in the Authorized redirect URIs field, then click the "Create" button to create the credentials.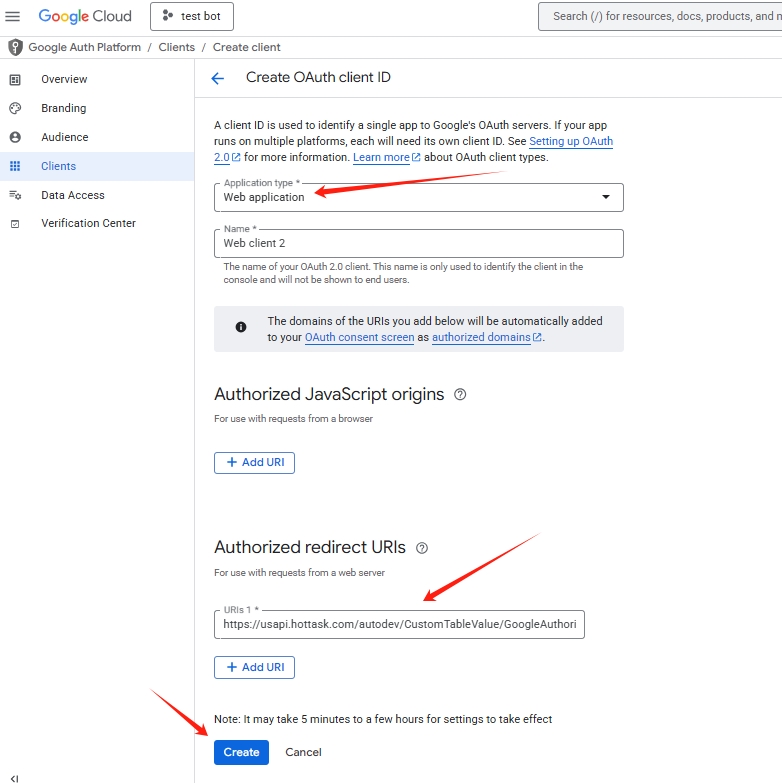
-
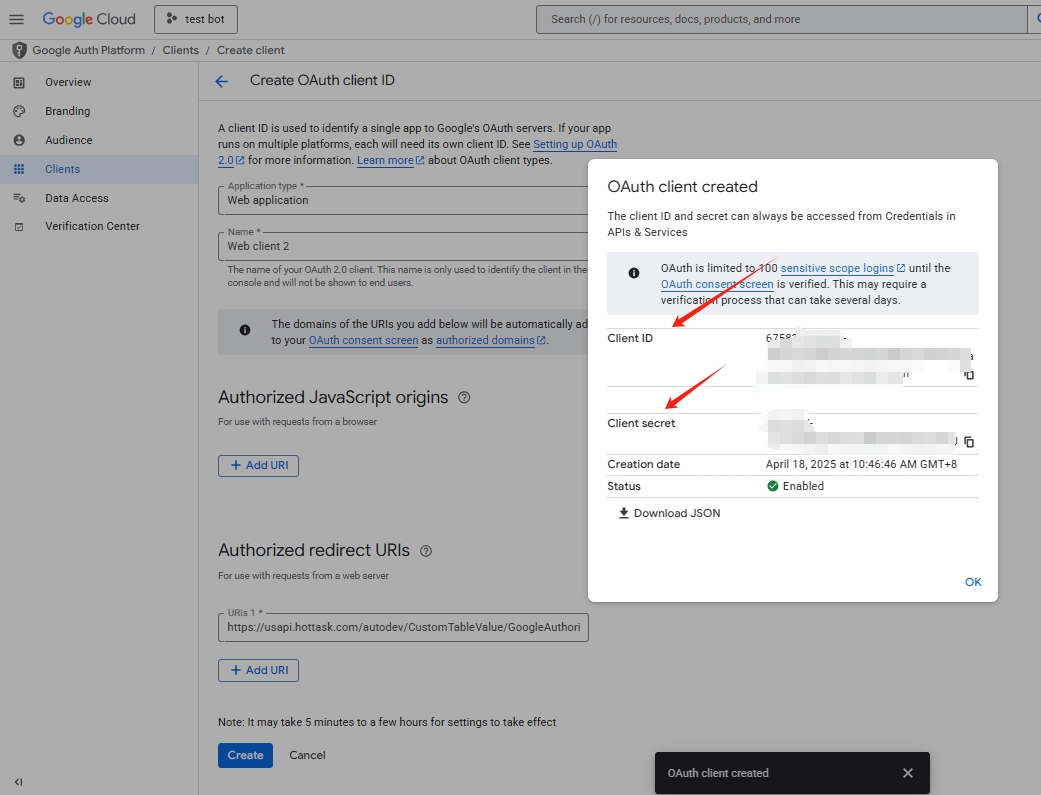
This will generate a Client ID and Client Secret. Copy the Client ID and Client Secret.
-
Return to the Google Login settings page in
EZsite, enter the Client ID and Client Secret copied in step 9, then click the "Save" button to save the settings.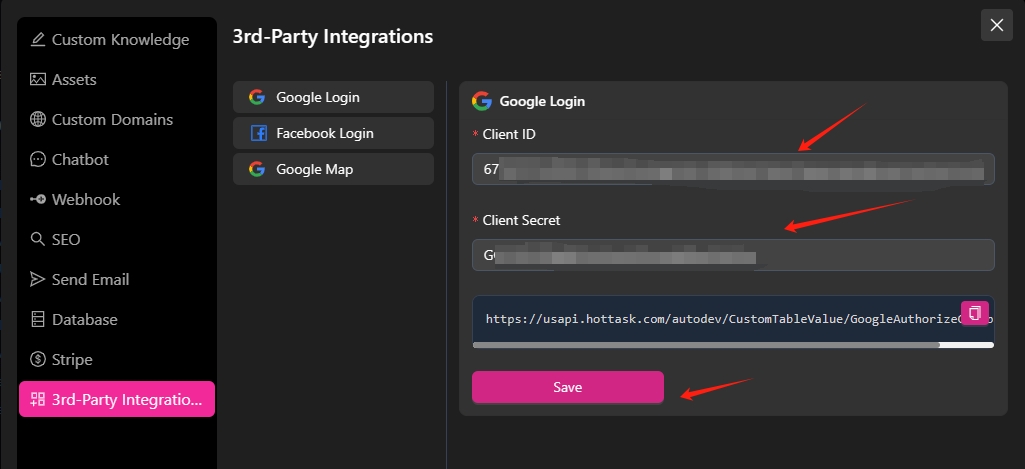
Using Google Login to Sign in to EZsite
Use the following prompt to create a website with Google login.
Create a Sudoku mini-game where users can login, register, and use Google login.